
How To Grow Your Email List From The Very Beginning

By Prebuilt Sites Team
May 11, 2022
I cannot stress enough how important it is to prioritize growing your email list in your business! Your email list is the only audience that you own, and sees the highest conversion rate. Even if you don’t have anything to sell (yet), growing an email list will help build a relationship with your audience, and get them ready to buy when you do have something to sell. But how do you grow your email list? First, you need a eye-catching website with an interesting opt-in form above the fold. This means you need to have a cool freebie, email course, checklist, etc. that provides real value located right smack on top of the page before your audience has to begin scrolling. Create 3-5 opt-ins and showcase them on your website in at least seven areas if you want to see conversion. Once these users have subscribed to your email list, you want to keep them around by sending them interesting and value-packed emails. Notice that the trend here is providing value! If you have any questions about how to grow your email list or want our help, reach out to us at Prebuilt Sites or The BBS Agency. We’d love to help you out!
If you haven’t noticed, there is a LOT of information online about how to grow your email list and start a business.
(Okay, who are we kidding, you totally noticed).
And while learning one-off strategies can be helpful, they don’t give you a PLAN, especially when you’re starting at zero, which can make things feel a little hopeless. Like maybe you’re doing something wrong because you’re trying all of these strategies…yet none of them are working.
But here’s the deal: if you use a strategy that isn’t meant for someone at your stage of business or email list-building, it’s not going to serve you as well as something designed JUST for you and your situation. Ya feel me?
So, today I’m going to share a step-by-step list-building plan to help you grow your email list even if you’re starting from the beginning. Looking back, this is what I’d do if I had to start growing my list all over again, or if I were starting a new business.
Step 1: Create a sexy (and high-converting) website
No, you don’t need the most gorgeous, custom-designed website. You can easily set up a professional site with something like Squarespace or buy a WordPress theme for a few bucks. This is not a task you should spend an eternity on. ????
And trust me, I’ve seen plenty of wide-eyed entrepreneurs spend months on this part alone — mainly because they’re fearful of what comes next (creating content and fearing rejection) or they’re perfectionists.
So, if that sounds like you, give yourself one weekend to create a nice-looking site and then move on. You can always come back and update the design later on.
But more than just creating a “pretty” or “professional” website, you want to create a site that makes it easy to grow your email list.
Here are a few things that go into that:
A. HAVE AN OPT-IN FORM ABOVE THE FOLD.
“Above the fold” is just anything that a user sees before having to scroll down on your site (which is considered “below the fold”). Here’s what my previous website design looked like:
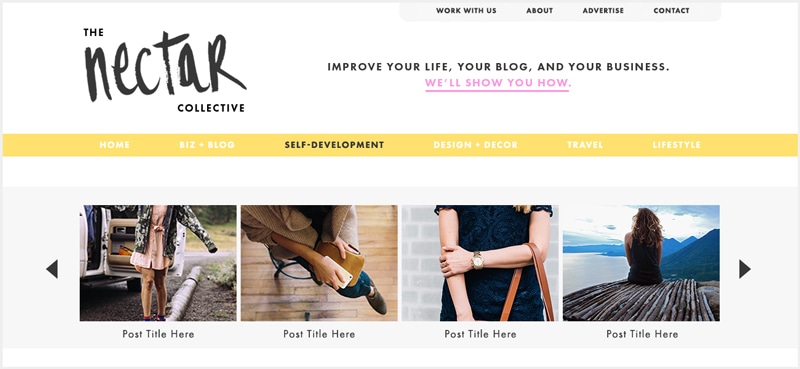
Source: Melyssa Griffin
As you can see, there’s no opt-in form above the fold at all.
Now, fast forward to my current (as of writing this) website design:

Source: Melyssa Griffin
Do you see how I have an opt-in form right at the top of my website?
Well get this: As soon as I implemented this simple tactic, the number of people opting in to my list each day DOUBLED.
That’s a pretty high ROI for a simple tweak, right?
My site was custom built on WordPress, but I’ve heard that Squarespace offers a similar theme. There is also a plugin called Sumo, which offers a similar feature. Or if you use a website builder like Elementor, Thrive Theme Builder or Divi, you can build yours using their templates.
B. INCLUDE 3-5 ADDITIONAL OPT-IN FORMS AROUND YOUR SITE.
Have you ever heard the Rule of 7? Well, it says that someone has to see something SEVEN times before noticing it and taking action.
The mistake that a lot of people make (and that I used to be very guilty of) is that they only include one or two opt-in forms on their site (often in their sidebar, which is easy to miss).
Here are the opt-in forms I have on my site at the moment:
- Above the fold/header
- Navigation menu
- Below all blog posts
- Within many blog posts (like this one)
- In my sidebar
- Popup
- In the footer
Coincidentally, I actually do have seven opt-in form locations on my site. Ha! In your case, I would definitely add multiple opt-in locations as well. One tool I use frequently is LeadBoxes (part of LeadPages) as it makes it very easy to add opt-in buttons wherever you want.
All of this sexy website creation is done so that when you move on to the next steps and start bringing people to your site, you already have a website that is set up for conversions.
Because the last thing you want is to work your tail feathers off creating great content and growing your traffic…only to have none of those people convert into email subscribers.
Step 2: Create opt-in incentives to grow your email list.
An opt-in incentive is exactly what it sounds like. An incentive to encourage someone to join your list. Offering opt-in incentives is win-win because it gives your reader extra value and it helps to grow your email list. Opt-in incentives (combined with Step 3) have been my bread and butter for growing my list.
So, what is an opt-in incentive? Here are a few examples of things you could offer:
- Worksheets
- Outline/cheatsheet
- Spreadsheet
- Printable
- Email course or challenge
- Video training or tutorial
- Webinar or audio recording
- E-book
- Resource library with many worksheets/ebooks/etc
Each of the incentives above is designed to offer free, additional value to your audience. I typically create two types of incentives:
- Incentives that aren’t attached to a particular piece of content. These are usually larger (like a free email course), though they don’t have to be, and can be shared anywhere on your site and still make sense for your audience.
- Incentives that are tied to a particular piece of content, like a blog post. These incentives are specific to one piece of content in particular. For example, in this blog post, I share tips about repurposing your blog content onto other platforms. I offer a “repurposing spreadsheet” incentive that helps people keep track of the content they’re repurposing. This incentive was created JUST for that blog post. And to show how helpful this strategy is, that particular incentive resulted in 887 new subscribers in its first 3 months.
My recommendation to you is to create both types of incentives: ones that are attached to a particular piece of content and at least one that you can use all over the damn place.
Specifically, try creating incentives for five blog posts or pieces of content that your audience has enjoyed, that are getting the most traffic, and that attract the RIGHT people (i.e. don’t just select a post because it gets a lot of traffic — it should be targeted at the exact people you want to reach).
Here are a few of my blog posts with different types of opt-in incentives:
- The Best + Worst Metrics to Track in Order to Grow Your Business
- 6 Things You Need to Know About Coming Up With a Profitable Online Course Idea
- The Ultimate Guide to Repurposing Your Blog Content (So You Can Reach More People by Doing Less)
- How to Create Time-Saving Systems for Your Business + Blog
Also, try creating one incentive that is a little less specific. This incentive can be used as your main opt-in on your site (like in that “above the fold” location) and can also be used in your social media profiles.
The reason we create these incentives is because once you start getting people to your website, you want them to have a reason to subscribe. In the next step, I’m sharing a powerful traffic-building strategy that will drive more peeps to your website, so following steps 1 and 2 first is essential. ????
Step 3: Use SEO to drive organic traffic to your site.
SEO stands for Search Engine Optimization and is a term that EVERYONE with a business should be familiar with. No matter which niche or industry you’re in. Or what kinds of products or services you sell. SEO is where it’s at.
Here’s the quick lowdown on how SEO works: I’m sure you’ve heard of Google. And Pinterest. Both of these are search engines that rank content based on most relevant/helpful to least relevant/helpful.
So, when you search for “how to bake salmon” on Google, you’re met with tons of recipes and tips on baking perfect salmon.
Or when you search for “beginner crossfit workouts” on Pinterest, you’re greeted with hundreds of pins about crossfit for newbies.
Magic, right?
No…SEO. ????
Your goal with SEO is to ensure that YOUR content pops up as one of the first results on Google and Pinterest when someone searches for a particular word or phrase.
So, how DOES one get their blog posts and pins at the top of search results? Well, there’s quite a lot that goes into SEO as a whole, but here’s one big thing you can do to infuse your content with more search engine power and watch as your posts start climbing the ranks:
Use keywords.
Since Google and Pinterest are both search engines (and search engines rely on keywords), this strategy works for both platforms. Hurrah!
A keyword is a word or phrase that someone might be searching for in order to find your blog post or product or anything, really.
So, if your post is about How to Potty Train Your Toddler, then your keyword might be “potty train toddler” or even simply “how to potty train toddler.”
Or if your post is about 13 Ways to Grow Your Instagram Account, then your keyword might be, “grow instagram account” or “get more instagram followers.”
The keywords I selected above are designed to target the actual language that your target audience might be searching for on Google or Pinterest.
Once you know the keywords you want to target for your blog post, there are a few places you should put them.
For Google SEO, put them in:
- Your blog post title
- Several times within your blog post
- Your blog post URL (notice how the URL for this post is simply “/grow-email-list” — a keyword I’m targeting here)
- Your image file name and description
For Pinterest SEO, put them in:
- Your blog post title (this will be pulled from your blog post and displayed on Pinterest if you have Rich Pins enabled)
- On your pin image itself
- Your pin’s description
- Your board descriptions
Not hard, right? But simply adding keywords to your content will drive more people to your site, rank your content higher in search results, and attract the RIGHT people to your website (because you’ve targeted exactly who you want to attract).
All of this new, targeted traffic, combined with your opt-in incentives and high-converting site design are the perfect storm that will help you grow your email list.
Honestly, steps 1-3 are how I acquired a strong majority of my subscribers. Doing these steps alone should yield a big payoff for your efforts. BUT keep in mind that SEO is not a quick fix. While you usually can see results on Pinterest within a few weeks, Google SEO tends to take 3-4 months before you’ll see much of an effect.
But there’s no quick fix for success, and once that SEO juice starts flowin’, it will continue to grow and grow.
In fact, once I started utilizing these three steps, my list grew by 6,000 subscribers within four months. HUGE for me at the time because my list was fairly small and completely stagnant.
After that, my list grew by 30,000 subscribers in the first year, and then grew to about 70,000 subscribers in 1.5 years. 5 years into my business, my email list is now at 200,000 subscribers I can’t stress enough how much good SEO and opt-in incentives can propel your community-building efforts forward.
Step 4: Create consistent content (with incentives).
Sound familiar? ????
Don’t stop at Step 2 and call it a day. You want to continue making opt-in incentives and add them to your new posts. I aim to create a new opt-in incentive on a monthly basis, which makes it manageable for me. You can certainly do more than that though, especially if you’re starting out fresh right now.
A cool thing you can also try is having a theme for your blog posts each month. So, each post falls under that monthly theme.
From there, you could easily create ONE opt-in incentive per month and then share it within all of your content for that month (since it will be relevant to your monthly theme and therefore could fit into each of your blog posts).
Step 5: Create KILLER email content.
Now, to tie this all up into a purdy bow, you don’t want to stop at growing your list and then send junk to your subscribers. I’m pretty sure you didn’t plan to do that anyways, but hey, it pays to be thorough, right?
These people are your BIGGEST fans and they care about what you’re doing online. Having someone give you their email address is kinda like someone giving you their digital phone number.
So, show them you care by creating stellar content that is helpful for them.
Whenever you create a new opt-in incentive, send it to your current list, too. No opt-in required.
Whenever you have an inspiring breakthrough or vulnerable, personal story that might resonate with them, share it.
Whenever you’re hosting a free workshop or just hit publish on an amazing piece of content, tell them about it.
And continue sharing valuable strategies and info with your list, long after they subscribe.
Doing this will not only keep your subscribers happy (and subscribed), but will also silently encourage them to share your work with their friends.
It may even lead to some features on larger websites. Check out a couple ways that my email list was featured on two popular sites (which led to more subscribers).
- Feature on Huffington Post about my email subject lines
- Feature on Brit+Co about writing great newsletters
So, if you do all of the above, you should start to notice an uptick in email subscribers. And the best part? With this particular system, your subscribers will be coming in on autopilot, meaning you don’t have to constantly be promoting your list and you don’t have to pay for ads.
Certainly, there are other things you can do to be more promotional about growing your list or to spend money acquiring subscribers — totally great, too! — but there’s a lot you can accomplish with the strategies above, especially if you’re busy or just getting started.
Stay tuned for next week! I’m going to be sharing a VERY powerful list-building (and money-making) strategy that is essentially “Step 6” of this post. It’s awesome for people who are just starting out, too.
Originally published on Melyssa Griffin.